
As an aspiring musician looking to take your art to the next level, an at-home recording studio is a great step towards growth. An at-home recording system will provide you with easy access to recording your music, begin growing your discography, and practicing your skills as a music artist. Though this may sound like no easy task, it is much more accomplishable than you may think.
Even as a beginner with a low budget, there are steps you can begin to take so that eventually you can reach the goals you have set. In this article, we’ll cover the essentials you will need to begin your at-home recording studio, which includes:
Many popular musical artists today gained traction with the songs that they wrote and recorded themselves as they were just starting. For example, Calvin Harris got a record deal after uploading songs and clips from his homemade debut album, ‘I Created Disco,’ to the social media platform MySpace. It all begins with what you can accomplish on your own, to prove what it is you can do with all the fancy and expensive supplies. While you can’t truly compare a beginner’s at-home recording studio to a professional studio, there are many benefits to having one.
While the pricing on professional recording studios varies by time and location, the average cost is about $60 to $180 an hour. Though creating your own at-home studio isn’t exactly “cheap,” it will save you money compared to repeatedly renting a space -- especially when thinking in terms of recording entire albums or multiple tracks. Sometimes recording one song can take multiple hours or days based on its complexity and your idea of perfection. Having your own studio will take away “hourly rates,” and you can put that money into better software, microphones, or instruments.
Aspiring to be a professional musician doesn’t just include specializing in your specific craft-- whether that is songwriting, performance, or instrumental skills. It includes recording, mixing, producing, editing, and advertising. While it's unrealistic to master all these things, it is extremely important and valuable to have at least basic to intermediate knowledge and skill in the technical aspects of music production.
Especially as a beginning artist, realistically, it will be your responsibility to put out your music until you can afford and have access to professionals in each of these fields. The ability to practice and learn through trial and error will aid you greatly as you continue growing in the industry. It will also allow you to learn your specific sound and music production process.
With your own personal recording studio, you aren’t restrained by anyone’s program or timing. You wouldn’t have to worry about finding the time that fits both your schedule and the studio’s schedule, as well as any panic at the last minute when you realize that you may need more time than you initially thought. You can take your time with experimentation and also go into the studio any time you feel inspired. At the end of the day, you are in your own space, and there is a comfort to that.

Choosing the right room in your home is the first big step in setting up an at-home recording studio. There are a lot of factors that go into which kind of room would be best, such as:
While it's basically impossible to have the perfect room in a pre-existing, average home, you can follow this little guideline to make the next best choice.
The room's acoustics and adding acoustic treatment are the most important steps in creating your home studio. Even with the most expensive microphones, if your room has terrible acoustics, it can make your music sound flat and low quality. As mentioned before, most homes are not built with acoustics in mind, and it's unrealistic to expect that. While you can always add reverb to your music, you can not remove natural reverb - it must be dealt with in the space and at the time of recording.
That’s where acoustic treatment comes in. The best way to remove natural reverb is through absorption. Absorption can be accomplished through the use of bass traps and acoustic panels.
If you are starting with a very low budget, bass traps are the most important. They are meant to be placed in the corners of your room. These traps absorb all frequencies, so they maintain a natural frequency in a room, especially a small one. They can be found easily online, including on Amazon.
Only after purchasing and installing bass traps should you look into acoustic panels, meant to be placed on opposite parallel walls. They have mid to high-range absorption. These can also be found on Amazon, though more expensive than bass traps.
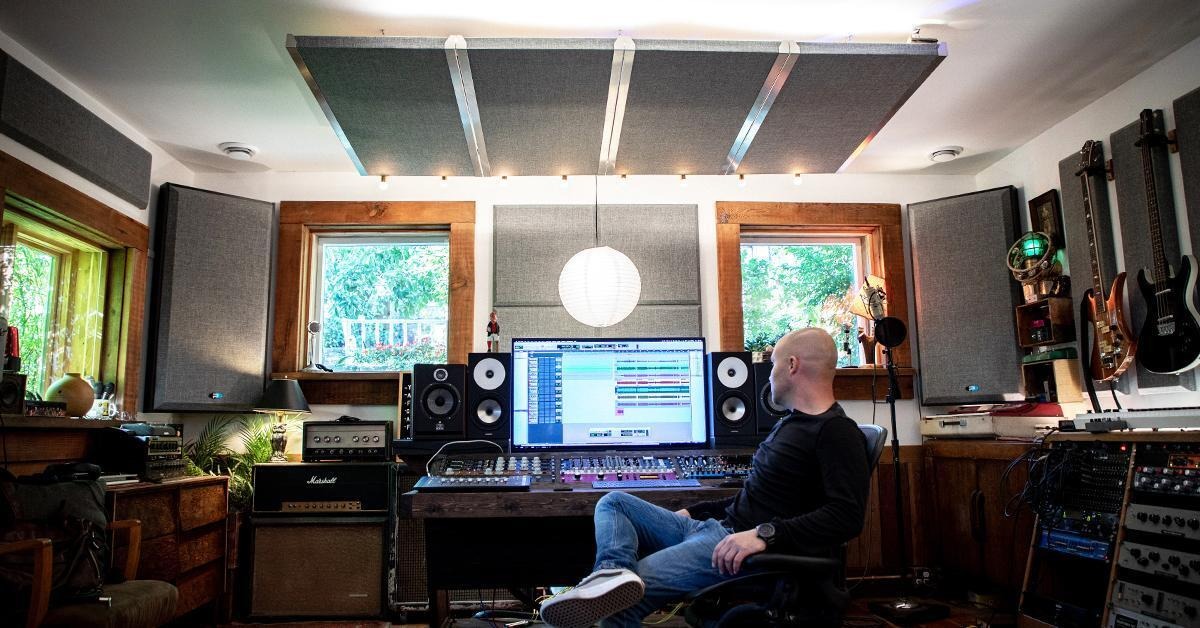
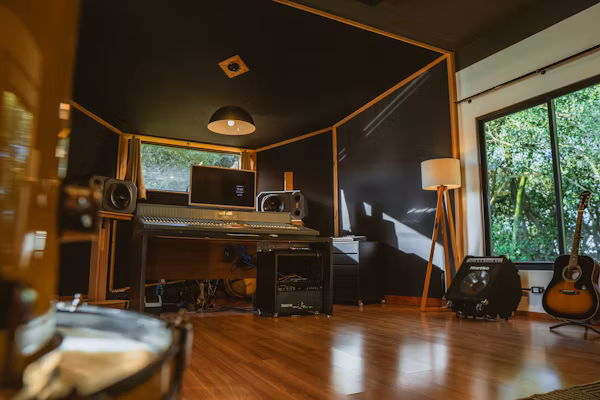
An at-home studio contains both a workstation and a recording station. The centerpiece of your studio will be the workstation where you take your recordings, mix, and edit until you get a final piece. As a beginner, any desk and chair will be useful, and you can use any you already have in your home.
The recording area is for the musician and includes the microphones, MIDI controllers, and studio rack. The way you actually set up the room depends on whether the studio will be for solo use or dual use (two or more people recording).
After acoustic treatment, the positioning of sound monitors is the next most important step. As a beginner, you aren’t expected to have a lot of equipment, but as you grow, you need to be aware of signal flow: “The path the audio signal must travel through your gear, from beginning to end.”
The signal flow depends on the positioning of sound monitors. For that, you must look at:
There are two main rules to follow when placing your sound monitors: 1. Your head should form an equilateral triangle with your monitors, and 2. Point the monitors directly toward your head.
To begin your home-recording studio, these are the top six recommended gear to start with:
A computer, but mainly a laptop, is one of the first things you will need. A laptop is recommended over a computer just due to its mobility and being able to move it and use it on the go. The music that you record will then go on your laptop to edit, mix, and eventually upload. If you are on a budget, stick to whatever laptop/computer you may already have until you have a higher budget. What’s been recommended is a MacBook Pro, due to its speed, memory, and high ratings – and the fact that it can be easily connected to your phone if you have an Apple phone.
DAW stands for Digital Audio Workstation and is used to record, mix, and edit on whatever desktop device you have. The audio interface is a hardware device that the DAW specifically uses to record your sounds and then send them to your headphones and monitors.
Luckily, you can buy them as a pair, which is cheaper and recommended. Some recommendations:
To begin with, focus on only one or two microphones, based on your needs and what it is you are recording.
Begin with those two kinds of microphones, and as you continue building your gear, instruments, and budget, you can look into which other microphones are best for the instruments you have.
For beginners, it's best to start with closed-back headphones. These headphones specifically let you hear the backing track as well as your instruments as you record. The sound quality is a little less, but that is because these headphones focus on sound isolation. Once you have a higher budget, you can then invest in open-back headphones, which are used in mixing because they have a higher sound quality. Until then, get a pair of good closed-back headphones, such as the Sony MDR 7506.
As we have mentioned, studio monitors are one of the most important steps in your home recording studio. These monitors are where you do the majority of your mixing because of their flatter frequency response. These speakers are one of the more expensive purchases for your studio, but it's because they are so necessary and useful.
One of the more affordable options can be found on Amazon, with about 4.7/5 stars, is the KRK Rokit 5 G4. One reviewer stated, “These 5” KRK monitors are best in class, hands down! I’ve owned many different brands and sizes and these are much better and somewhat cheaper than others in the same size. They are FLAT and the separation in sound is nothing less than magic. Sound quality will blow your mind!!!...”
Though not always included or thought of when thinking of necessary gear, you will need cables to connect everything you have. The most standard and necessary type of cable is the XLR. For starters, you will need one XL XLR cable to connect your mic to the audio interface and then two short XLR cables to connect the audio interface to your audio monitors.
The Mogami brand is recommended, though still a bit pricey. It's better to invest and think long-term because cheaper means worse quality. They break easily and are much more sensitive to other noises and interference. Best to spend a bit more on cables than constantly have trouble with cheaper ones that will affect your sound quality.
While there is a lot of growth potential, these are six pieces of gear that a beginner should focus on purchasing first.
A home recording studio, though the thought can be quite daunting, can be quite doable and successful. It doesn’t need to be perfect, but slowly but surely, having access to this equipment can give you the knowledge and expertise to grow as a musician. It allows you to have the freedom to explore your creativity, improve your craft, and also create pieces that can eventually be released for the public to hear. Once you're ready to start creating, check out our article on 9 Effective Tips for Writing Memorable Melodies!

Don’t forget to follow Kellee for the latest news and music:
add soundcloud, IG
.jpg)

.jpg)

.jpg)
.jpg)

.png)